


I used to spend twenty minutes every morning standing in front of my wardrobe genuinely stumped. I had plenty of clothes — a silk blouse here, some wide-leg trousers there — but I couldn’t get them to feel like an outfit. They just felt like clothes I’d put on. It was my colleague Priya who finally said to me, “You’re shopping in the wrong order,” and she was absolutely right. I needed a system. So I built one, and now my mornings take about three minutes. This guide is the exact process I follow, start to finish, to pull together a polished office look every single time.
Your Roadmap to a Polished Office Look
Time estimate: 5 minutes to plan the night before, 3 minutes to dress in the morning.
What You’ll Need
Nothing exotic here. These are the building blocks I work with — most of them probably already live in your wardrobe.
- One anchor piece (a blazer, a statement blouse, or a dress — more on this in Step 1)
- A fitted base layer top — think silk cami, fine-knit turtleneck, or a classic white shirt
- Tailored trousers or a midi skirt in a neutral or complementary tone
- A blazer or cardigan as your second layer (only if your anchor isn’t already a blazer)
- Shoes with at least a slight heel OR clean pointed-toe flats
- A structured handbag — tote, shoulder bag, or small top-handle style
- One single accessory: a watch, a simple necklace, or a pair of stud earrings
- A full-length mirror (non-negotiable — trust me on this one)
That’s genuinely it. This method works because it’s built around pieces you repeat and rotate, not one-off statement items you wear twice. If you’re curious about the philosophy behind building a repeatable wardrobe like this, I talked about it in depth in my post on why I basically wear the same corporate outfits every day — it’s more freeing than it sounds.
Step 1: Pick the Anchor Piece
Every great office look starts with one dominant piece — the thing everything else will revolve around. I call it the anchor. It’s the item that has the most personality, the most structure, or the most visual weight in the outfit.
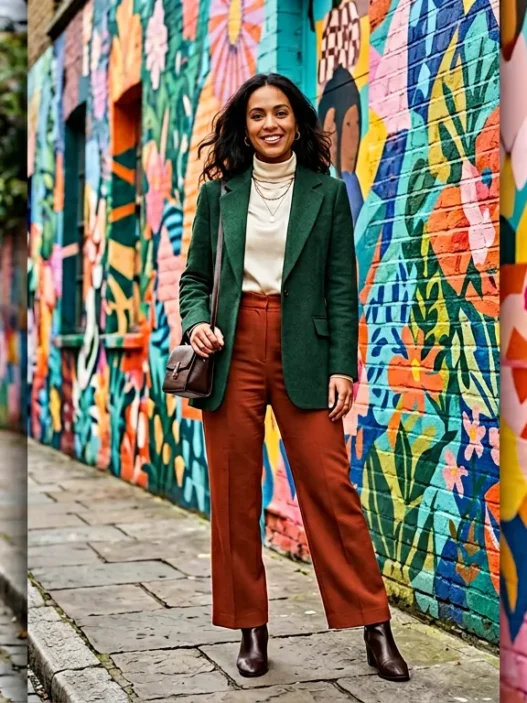
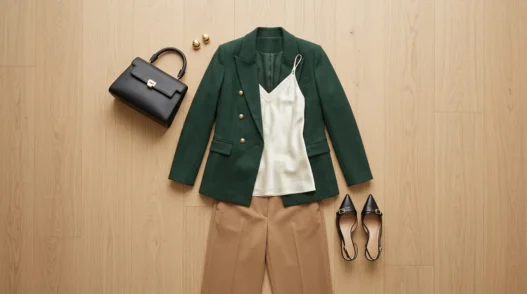
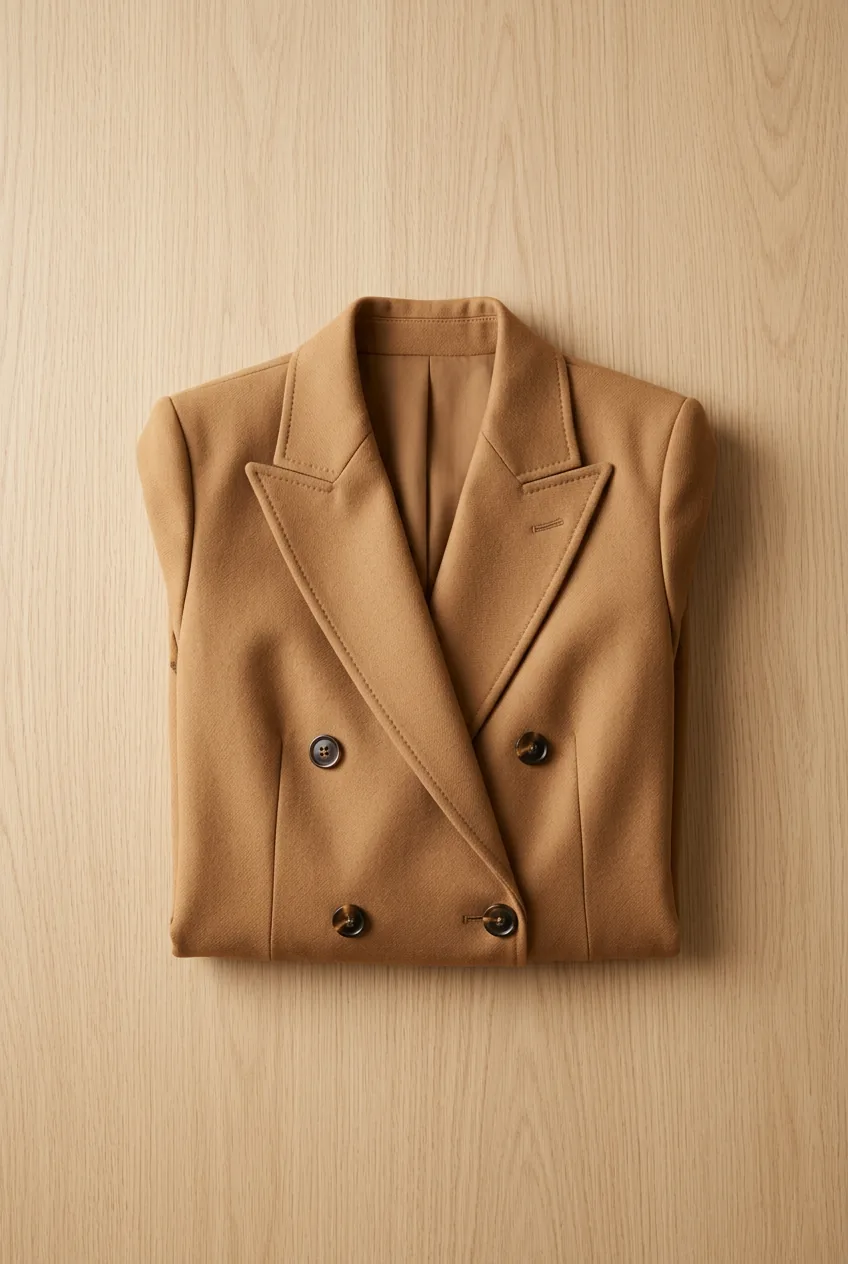
For me, the anchor is almost always a blazer in a strong color or interesting fabric. A camel wool blazer, a deep forest-green double-breasted style, a chalk-stripe tailored jacket — these pieces immediately signal “pulled together” before you’ve even thought about what’s underneath. But your anchor could also be a structured midi dress, a bold printed blouse, or even a really exceptional pair of wide-leg trousers in a textured fabric. The rule is simple: pick the piece you love most in today’s rotation, and build everything else around it.
Don’t pick two anchors. That’s where things go wrong. One statement, everything else in support.
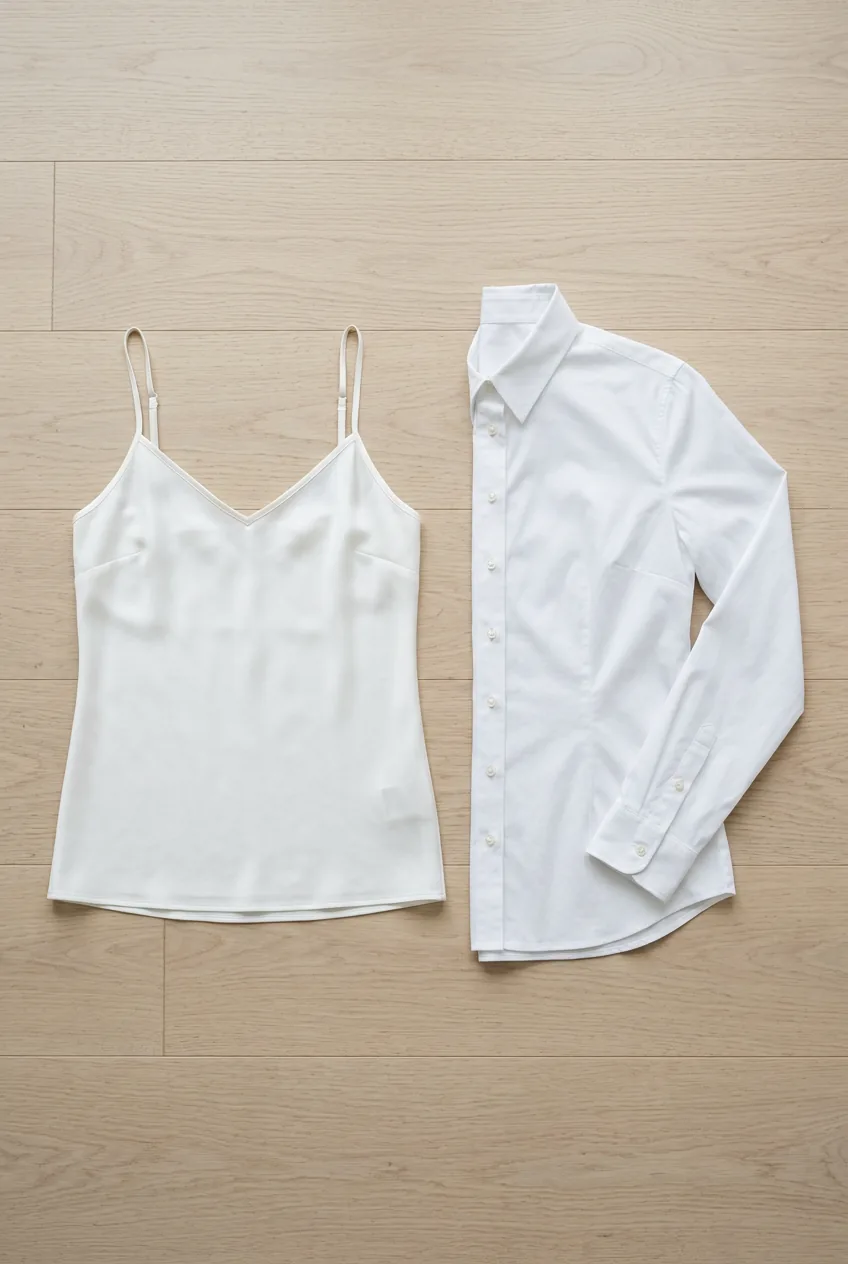
Step 2: Build the Base Layer
Now that your anchor is chosen, you need something underneath it. The base layer is not supposed to compete — its whole job is to let the anchor breathe. Think of it as a supporting actor, not a co-lead.
My personal go-to base layers: a white silk-effect cami tucked into trousers, a fine-knit ivory turtleneck under a blazer, or a classic fitted white button-down left slightly open at the collar. All neutral, all clean, all polished. If your anchor is already patterned or colorful, your base layer should be a solid. If your anchor is a classic neutral blazer, you can add a subtle stripe or a soft print underneath — but keep it subtle.
The tuck matters here too. A full tuck, a front-tuck, or a clean French tuck all read differently. For work, I almost always do a full tuck — it keeps the silhouette sharp. How to tuck a shirt for a polished result is something more people should look up, honestly.
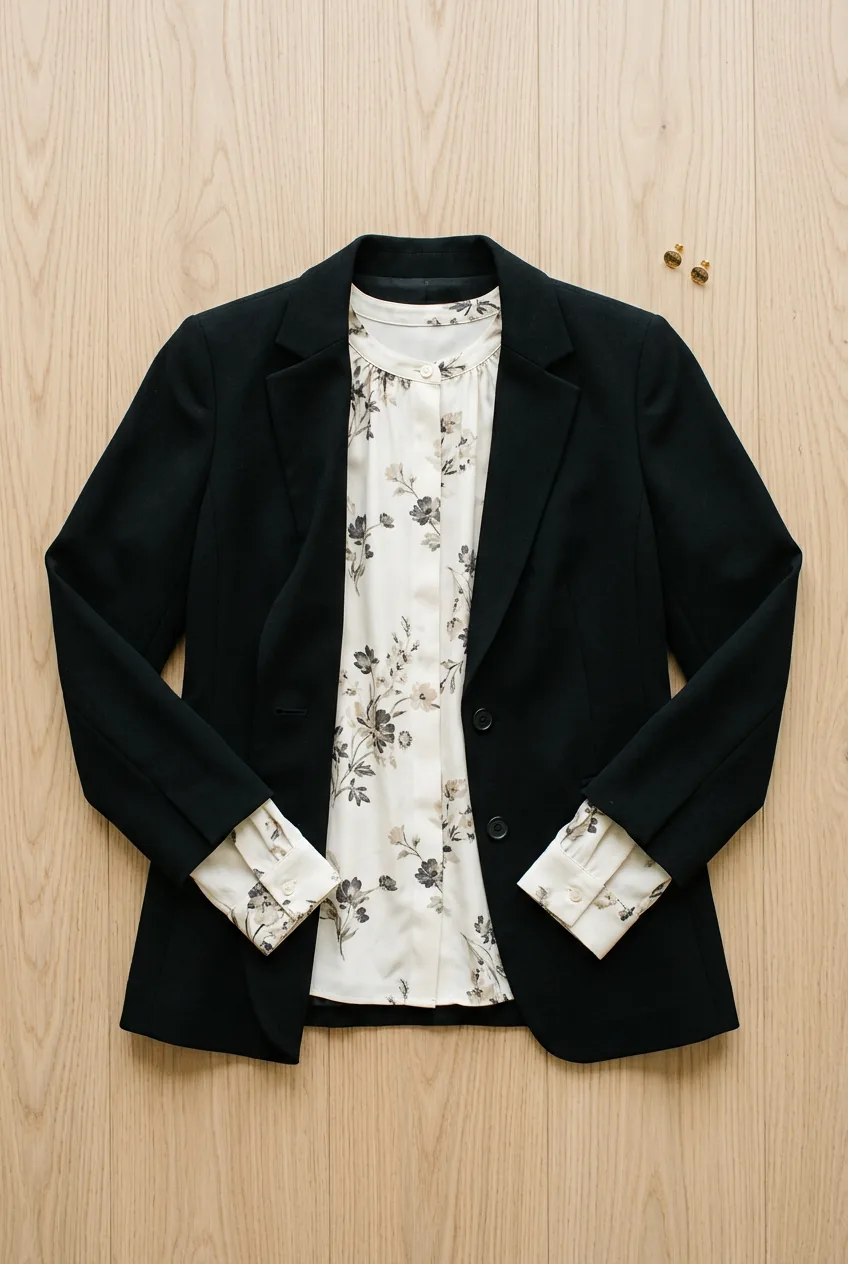
Step 3: Add the Second Layer
If your anchor piece in Step 1 was a blazer, skip this step — your layering is already done. But if your anchor was a blouse or a dress, this is where you bring in structure with a jacket, blazer, or cardigan over the top.
The second layer is what transforms an “I’m going to brunch” outfit into an office look. It adds intentionality. A longline cardigan over a silk blouse reads professional in a relaxed environment. A sharp black blazer over a printed midi dress instantly elevates it to boardroom territory. I keep three second-layer pieces in regular rotation: a camel blazer, a black blazer, and a fine-knit grey cardigan. Between those three, I can second-layer my way through almost any situation.
Mistake I made: I used to layer a blazer over a blazer — yes, really. I thought a longline duster coat worn open over a fitted blazer looked editorial. My manager at the time described it as “a lot going on.” She wasn’t wrong. Two structured layers compete with each other. Keep the second layer either fitted OR relaxed — never two structured pieces fighting for dominance.
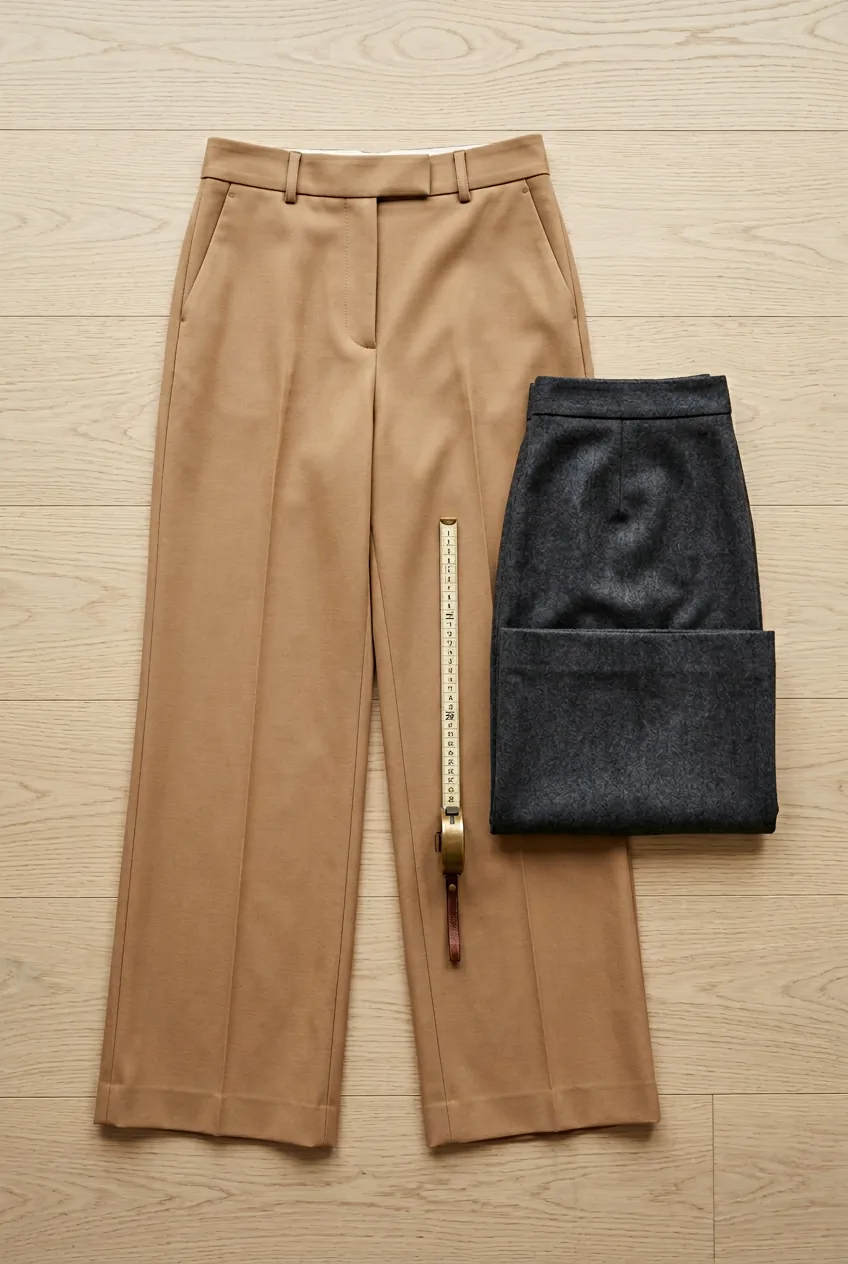
Step 4: Choose Your Trousers or Skirt
This is honestly the step that makes or breaks the whole look — and it’s the one most people rush through. Your bottom half sets the silhouette of your entire outfit, and the silhouette is what people register from across the room.
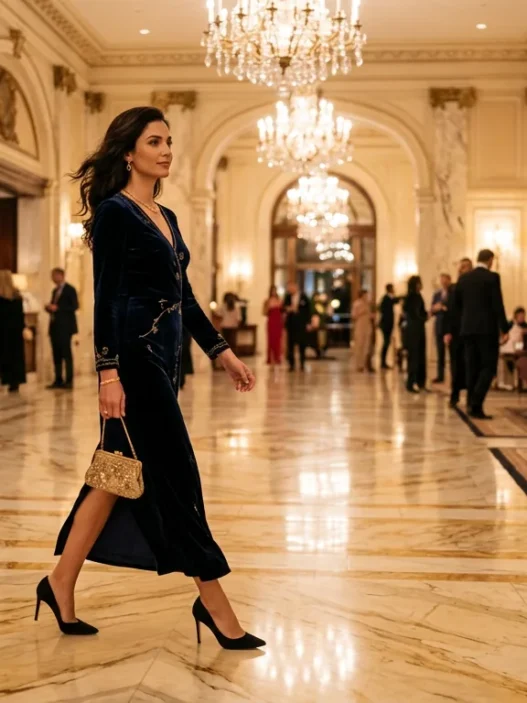
The golden rule I follow: if your top half is structured and fitted, go wider on the bottom. If your top is relaxed or flowy, go more tailored on the bottom. It’s all about balance. Wide-leg trousers with a fitted blazer is one of my all-time favorite office combinations — she’s wearing exactly that in the photo below, and look how the proportions just work. The blazer hits right at the hip, the trousers skim the floor, and the whole thing looks expensive without being complicated.
For skirts, a midi length (hitting somewhere between knee and calf) is the most versatile for the office. It moves well, works with both heels and flats, and reads consistently professional. I have a whole section about this in my breakdown of how to wear business professional outfits if you want more detail on length and formality levels.
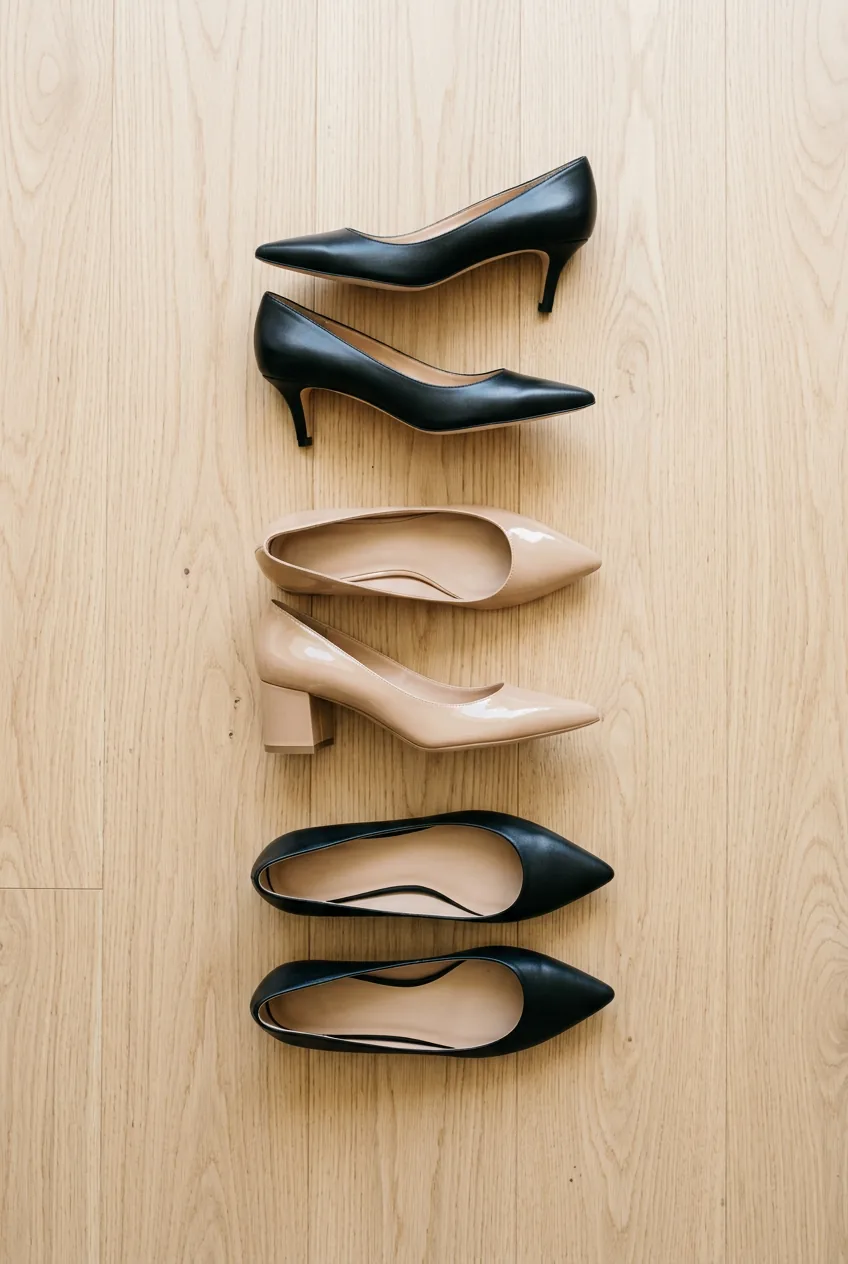
Step 5: Pick the Right Shoes
Shoes can either complete an office look or quietly undermine the whole thing. I’ve learned this the hard way — specifically, the day I paired a beautiful camel blazer and tailored trousers with chunky white trainers because I was “feeling casual.” I looked like I was about to attend a business meeting and then immediately run a 5K.
For the office, you have three reliable options: a block-heel pump (comfortable, classic, authoritative), a pointed-toe kitten heel (elegant without the back pain), or a sleek pointed-toe flat (modern and completely underrated). I’ve been reaching for pointed-toe flats almost exclusively lately — they elongate the leg even without a heel, and after a full day on your feet, you’ll thank yourself. The key word is pointed. A round-toe flat reads more casual; a pointed toe reads intentional.
Color-wise: match your shoes to the darkest piece in your outfit, or go with a nude tone close to your skin. Both approaches visually lengthen the leg. Choosing professional work shoes is something worth spending five minutes on if you’re building a capsule for the office.
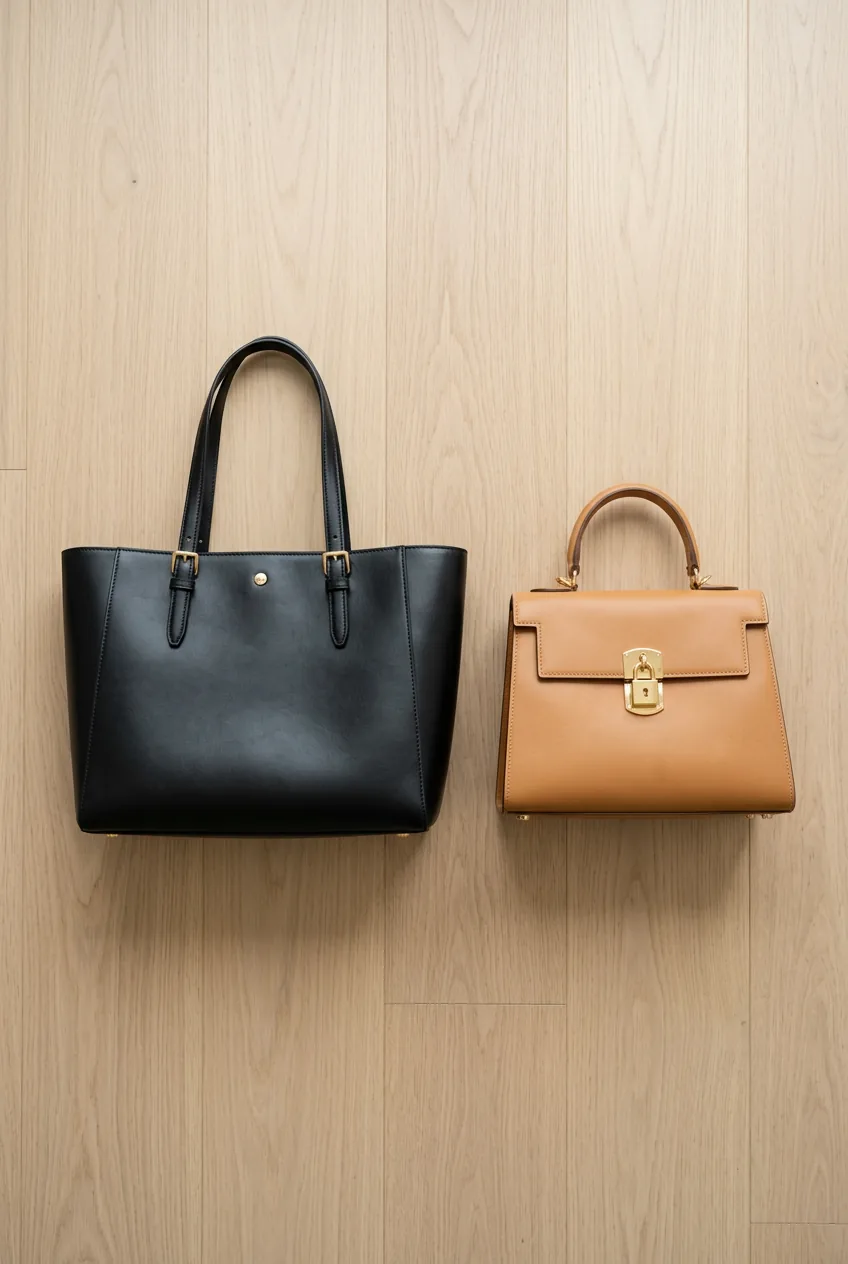
Step 6: Add a Structured Bag
Your bag is doing more work than you think. An unstructured slouchy bag — even a beautiful one — softens the whole look. For the office, you want structure. A bag with clean lines, a defined shape, and visible hardware.
My personal formula: one tote bag for heavy laptop days, one medium shoulder bag for lighter days, one small top-handle bag for meetings where I don’t need to carry much. The tote should be large but not floppy — look for structured canvas or leather with a flat base that holds its shape. The shoulder bag should have a short enough strap to sit at your hip. And that small top-handle? That one feels the most intentional, the most dressed-up, and I reach for it whenever I want the outfit to read “senior” rather than “just arrived.”
Check out my formula-based approach to my corporate outfits daily formula — bag selection is baked right into the system and I explain the exact rotation I use.
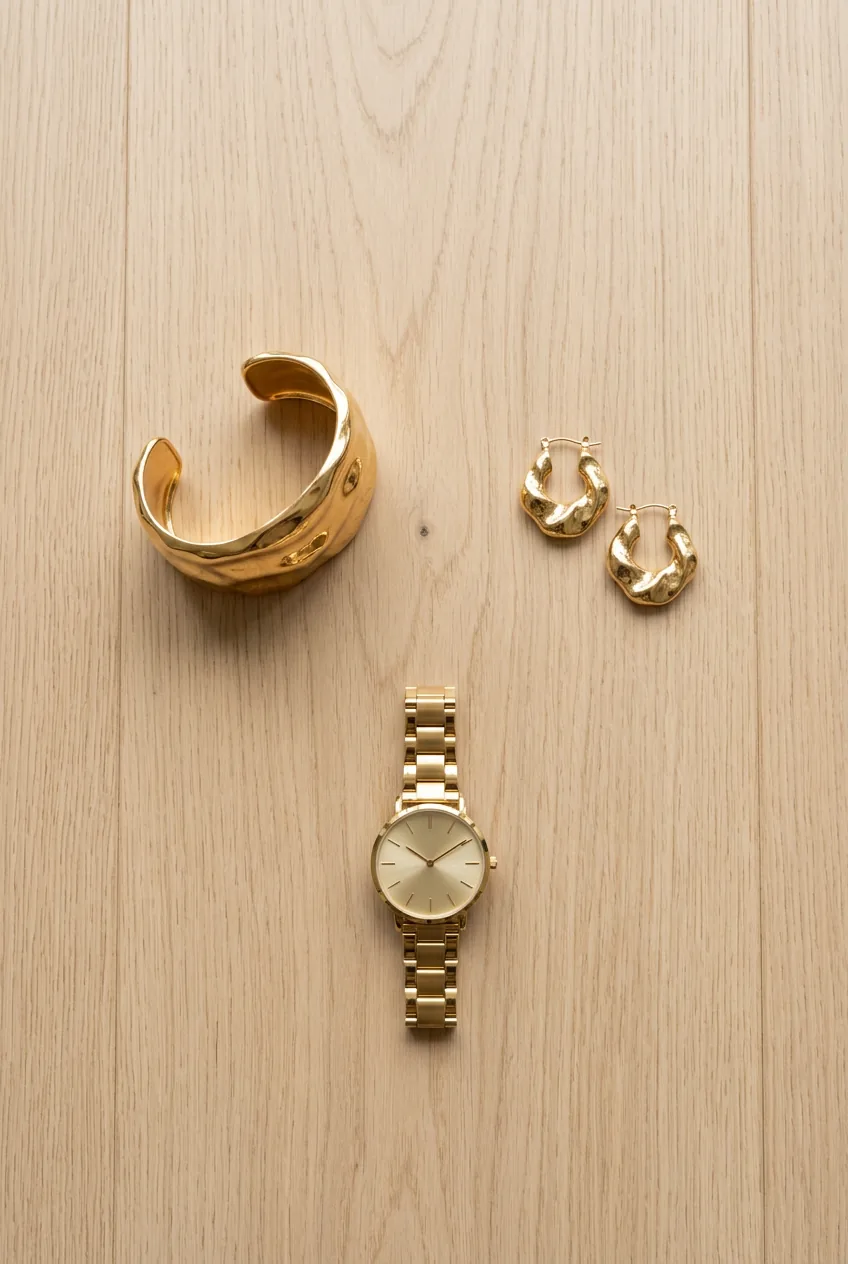
Step 7: Finish With a Single Statement Accessory
One. Not three. Not “a necklace AND earrings AND a bracelet AND a belt AND a scarf.” One statement accessory, chosen deliberately, and then you stop.
This is the step that separates an outfit that looks assembled from one that looks styled. The accessory is the period at the end of the sentence. For a classic office look, I rotate between: a gold watch (my most-worn), a pair of sculptural gold hoop earrings (not too large — think 3cm diameter), a simple pearl drop earring for days when I want to feel a bit more refined, or a structured belt to define the waist if I’m wearing something looser. Notice she’s wearing a single gold cuff in the photo — that’s it, nothing else, and it makes the whole outfit feel finished rather than bare.
The trick is to pick your accessory last, after you can see the whole outfit together. What does it need? More warmth? Gold hardware. More polish? A delicate necklace. More edge? A geometric earring. Let the outfit tell you what it’s missing rather than piling things on from the start. And if you want to explore seasonal variations on this, my roundup of elegant winter workwear has some great examples of how accessory choices shift when the layers get heavier. Minimalist work accessorizing is also worth bookmarking.
The Finished Look
When I follow this process — anchor piece first, base layer, second layer, bottoms, shoes, bag, single accessory — I end up with an outfit that feels considered without being overthought. It photographs well, it holds up through a full day of meetings, and most importantly, I feel good in it from the moment I leave the house to the moment I get home.
The first time I committed to this method properly, I wore a forest-green double-breasted blazer as my anchor, a white silk cami underneath, high-waisted camel wide-leg trousers, black pointed-toe kitten heels, a black structured top-handle bag, and a single pair of gold dome earrings. Three people asked me where I’d bought the blazer. I’d had it for two years. The outfit just finally made it shine. That’s what a system does — it stops hiding your good pieces and starts showing them off.
If you want to take this further into warmer months, my guide to office summer outfits applies all the same principles with lighter fabrics and a more relaxed colour palette.
Quick Answers
What’s the most important step in building an office look?
Step 1 — choosing your anchor piece — is where the whole outfit’s identity is decided. Everything else is just support. If you start from the wrong anchor (something you don’t love or that doesn’t fit well), no amount of clever accessorizing will save it.
Can I follow this method for smart casual offices, not just formal ones?
Absolutely. The same seven steps apply — you just swap the pieces. Your anchor might be a linen shirt instead of a blazer. Your second layer might be an open overshirt rather than a tailored jacket. The structure of the process stays identical; the formality level shifts based on the pieces you choose.
How do I keep office outfits from feeling boring when I’m repeating a formula?
Rotate your anchor pieces and let them do the variation work. If your anchor changes — camel blazer Monday, forest-green blazer Wednesday, bold printed blouse Friday — the outfit feels fresh even when the supporting pieces stay the same. The formula is invisible to everyone but you.
What if I only have 10 minutes to get dressed?
Do Steps 1, 4, 5, and 7 only. Anchor piece + bottoms + shoes + one accessory is already a complete and polished office look. Steps 2, 3, and 6 add refinement, but the core outfit works without them in a pinch.
How many office looks can I build from a capsule wardrobe using this method?
With 3 anchor pieces, 2 base layers, 3 bottom pieces, 2 pairs of shoes, and 2 accessories, you can technically build over 70 combinations. In practice, you’ll gravitate toward about 10–12 reliable outfits — which is plenty for a full working month without repeating anything obvious.